


Every one of us, at some point, would need to deploy a static website. It might be because the page is just a portfolio or a single-page JavaScript application that would not need heavy frameworks. So most of us have to host a static website, It might be with S3, Azure Blob Storage, etc. So while doing that most of us will simple copy the files to the S3 ( In my case ). Yet it might be a static website but the bugs or the correction will be there for sure. Then you have to manually replace the files with the S3. So today I will automate this whole process of S3 deploying using Github Actions. So let's get started.
So what is git hub actions
You may construct custom lifecycle routines of software development straight into your Github repository via Github Actions. The workflows consist of several activities known as actions which may be carried out under specific circumstances automatically. This allows you to add continuous integration (CI), CD- and many more functions right in your repository. With that said let's get started.
Prerequisites
- AWS Account or IAM User
- Static Website
- Github Repo
Skip to Step - 2 if you already have a GitHub repo set.
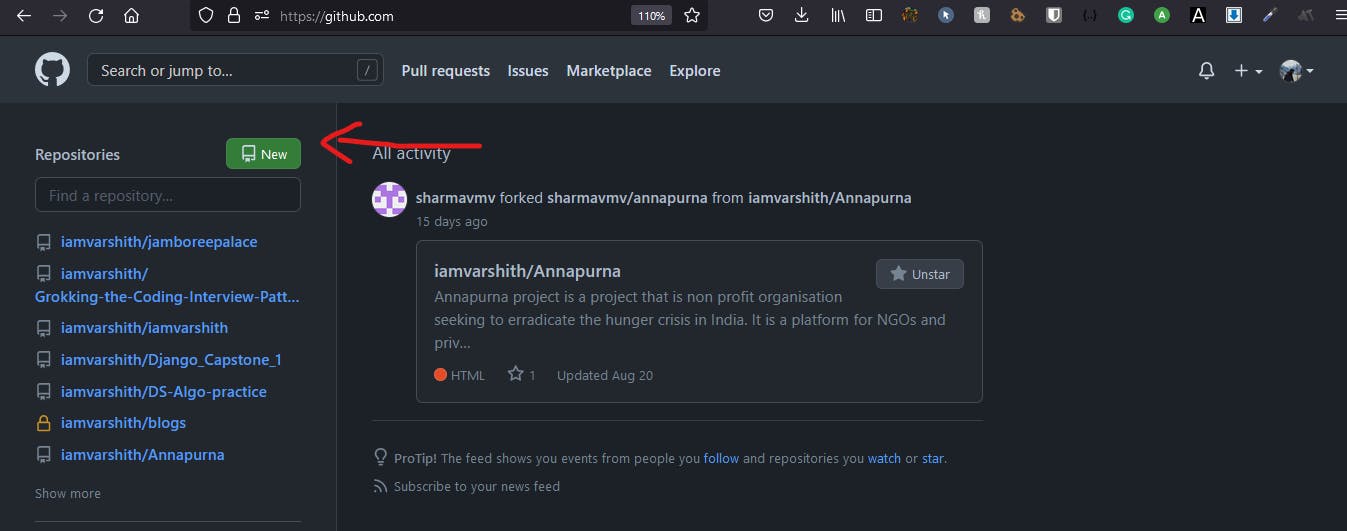
Step - 1 Create A Github Repo
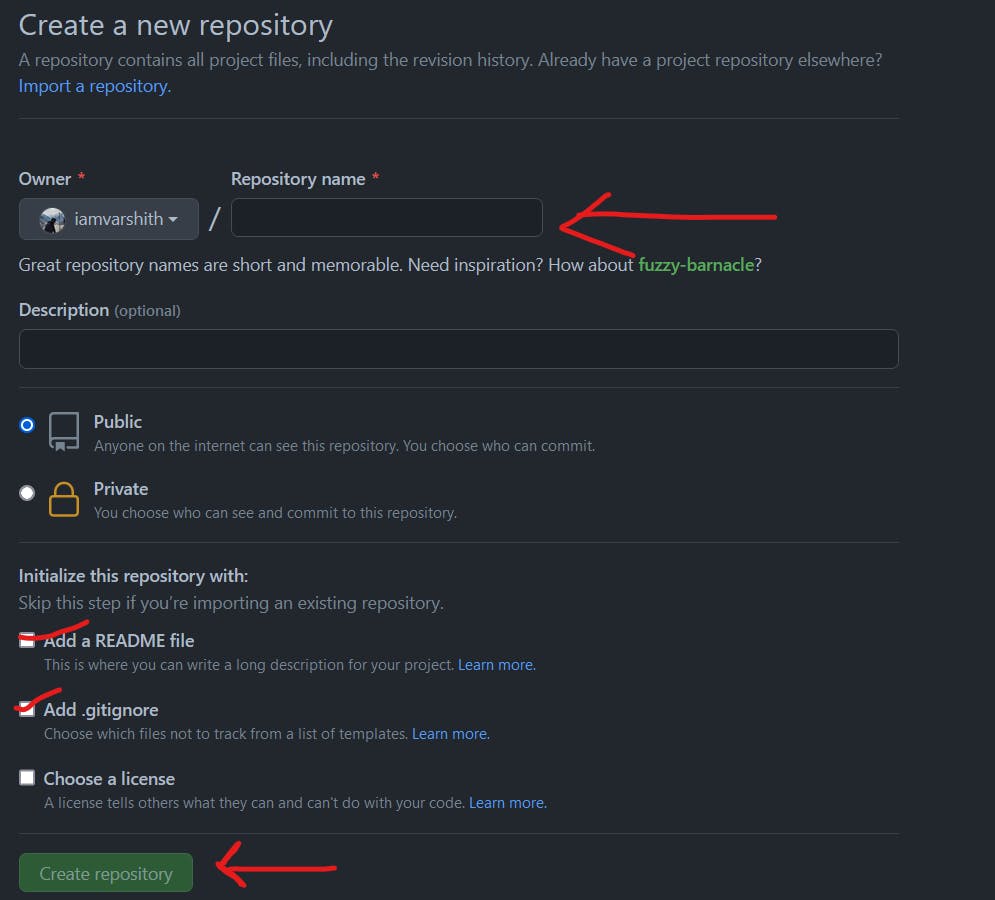
Step -2 Place The code in the repository
Now your repository is created, So let's start uploading your own Html, CSS, Js, Images, etc. in the repository. In case you want a dummy static website for a practice copy the code from below
spin.html
<!DOCTYPE html>
<html lang="en" >
<head>
  <meta charset="UTF-8">
  <title>Spin Wheel Using JS</title>
  <link rel="stylesheet" href="./spin.css">

</head>
<body>
<!-- partial:index.partial.html -->
<center><div id="chart"></div>
    <div id="question"><h1></h1></div></center>

    <script src="https://d3js.org/d3.v3.min.js" charset="utf-8"></script>
<!-- partial -->
  <script  src="./spin.js"></script>

</body>
</html>
spin.css
body{
    background-image: url(technical2.png);
}

text{
        font-family:Helvetica, Arial, sans-serif;
        font-size:11px;
        pointer-events:none;
    }
    #chart{
       /* position:absolute;

        width:500px;
        height:500px;
        top:0;
        left:0;*/
    }
    #question{
        position: absolute;
        width:400px;
        height:500px;
        top:180px;
        left:1000px;
    }
    #question h1{
        color: white;
        text-shadow: -1px 0px #fe0201, 1px 0px #06ffff, -2px 0px #fe0201, 2px 0px #06ffff, -3px 0px #fe0201, 3px 0px #06ffff, -4px 0px #fe0201, 4px 0px #06ffff, -5px 0px #fe0201, 5px 0px #06ffff;
        font-size: 90px;
        font-weight: bold;
        font-family: "Helvetica Neue", Helvetica, Arial, sans-serif;
        position: absolute;
        padding: 0;
        margin: 0;
        top:50%;
        -webkit-transform:translate(0,-50%);
                transform:translate(0,-50%);
    }
spin.js
var padding = {top:20, right:40, bottom:0, left:0},
            w = 500 - padding.left - padding.right,
            h = 500 - padding.top  - padding.bottom,
            r = Math.min(w, h)/2,
            rotation = 0,
            oldrotation = 0,
            picked = 100000,
            oldpick = [],
            color = d3.scale.category20();//category20c()
            //randomNumbers = getRandomNumbers();
        //http://osric.com/bingo-card-generator/?title=HTML+and+CSS+BINGO!&words=padding%2Cfont-family%2Ccolor%2Cfont-weight%2Cfont-size%2Cbackground-color%2Cnesting%2Cbottom%2Csans-serif%2Cperiod%2Cpound+sign%2C%EF%B9%A4body%EF%B9%A5%2C%EF%B9%A4ul%EF%B9%A5%2C%EF%B9%A4h1%EF%B9%A5%2Cmargin%2C%3C++%3E%2C{+}%2C%EF%B9%A4p%EF%B9%A5%2C%EF%B9%A4!DOCTYPE+html%EF%B9%A5%2C%EF%B9%A4head%EF%B9%A5%2Ccolon%2C%EF%B9%A4style%EF%B9%A5%2C.html%2CHTML%2CCSS%2CJavaScript%2Cborder&freespace=true&freespaceValue=Web+Design+Master&freespaceRandom=false&width=5&height=5&number=35#results
        var data = [
                    {"label":"",  "value":1,  "question":"Team 1"}, // padding
                    {"label":"",  "value":2,  "question":"Team 2"}, //font-family
                    {"label":"",  "value":3,  "question":"Team 3"}, //color
                    {"label":"",  "value":4,  "question":"Team 4"}, //font-weight
                    {"label":"",  "value":5,  "question":"Team 5"}, //font-size
                    {"label":"",  "value":6,  "question":"Team 6"}, //background-color
                    /*{"label":"IPAD PRO",  "value":7,  "question":"Which word is used for specifying an HTML tag that is inside another tag?"}, //nesting*/
                    /*{"label":"LAND",  "value":8,  "question":"Which side of the box is the third number in: margin:1px 1px 1px 1px; ?"}, //bottom
                    {"label":"MOTOROLLA",  "value":9,  "question":"What are the fonts that don't have serifs at the ends of letters called?"}, //sans-serif
                    {"label":"BMW", "value":10, "question":"With CSS selectors, what character prefix should one use to specify a class?"}*/
        ];
        var svg = d3.select('#chart')
            .append("svg")
            .data([data])
            .attr("width",  w + padding.left + padding.right)
            .attr("height", h + padding.top + padding.bottom);
        var container = svg.append("g")
            .attr("class", "chartholder")
            .attr("transform", "translate(" + (w/2 + padding.left) + "," + (h/2 + padding.top) + ")");
        var vis = container
            .append("g");

        var pie = d3.layout.pie().sort(null).value(function(d){return 1;});
        // declare an arc generator function
        var arc = d3.svg.arc().outerRadius(r);
        // select paths, use arc generator to draw
        var arcs = vis.selectAll("g.slice")
            .data(pie)
            .enter()
            .append("g")
            .attr("class", "slice");

        arcs.append("path")
            .attr("fill", function(d, i){ return color(i); })
            .attr("d", function (d) { return arc(d); });
        // add the text
        arcs.append("text").attr("transform", function(d){
                d.innerRadius = 0;
                d.outerRadius = r;
                d.angle = (d.startAngle + d.endAngle)/2;
                return "rotate(" + (d.angle * 180 / Math.PI - 90) + ")translate(" + (d.outerRadius -10) +")";
            })
            .attr("text-anchor", "end")
            .text( function(d, i) {
                return data[i].label;
            });
        container.on("click", spin);
        function spin(d){

            container.on("click", null);
            //all slices have been seen, all done
            console.log("OldPick: " + oldpick.length, "Data length: " + data.length);
            if(oldpick.length == data.length){
                console.log("done");
                container.on("click", null);
                return;
            }
            var  ps       = 360/data.length,
                 pieslice = Math.round(1440/data.length),
                 rng      = Math.floor((Math.random() * 1440) + 360);

            rotation = (Math.round(rng / ps) * ps);

            picked = Math.round(data.length - (rotation % 360)/ps);
            picked = picked >= data.length ? (picked % data.length) : picked;
            if(oldpick.indexOf(picked) !== -1){
                d3.select(this).call(spin);
                return;
            } else {
                oldpick.push(picked);
            }
            rotation += 90 - Math.round(ps/2);
            vis.transition()
                .duration(3000)
                .attrTween("transform", rotTween)
                .each("end", function(){
                    //mark question as seen
                    d3.select(".slice:nth-child(" + (picked + 1) + ") path")
                        .attr("fill", "#111");
                    //populate question
                    d3.select("#question h1")
                        .text(data[picked].question);
                    oldrotation = rotation;

                    /* Get the result value from object "data" */
                    console.log(data[picked].value)

                    /* Comment the below line for restrict spin to sngle time */
                    container.on("click", spin);
                });
        }
        //make arrow
        svg.append("g")
            .attr("transform", "translate(" + (w + padding.left + padding.right) + "," + ((h/2)+padding.top) + ")")
            .append("path")
            .attr("d", "M-" + (r*.15) + ",0L0," + (r*.05) + "L0,-" + (r*.05) + "Z")
            .style({"fill":"black"});
        //draw spin circle
        container.append("circle")
            .attr("cx", 0)
            .attr("cy", 0)
            .attr("r", 60)
            .style({"fill":"white","cursor":"pointer"});
        //spin text
        container.append("text")
            .attr("x", 0)
            .attr("y", 15)
            .attr("text-anchor", "middle")
            .text("SPIN")
            .style({"font-weight":"bold", "font-size":"30px"});


        function rotTween(to) {
          var i = d3.interpolate(oldrotation % 360, rotation);
          return function(t) {
            return "rotate(" + i(t) + ")";
          };
        }


        function getRandomNumbers(){
            var array = new Uint16Array(1000);
            var scale = d3.scale.linear().range([360, 1440]).domain([0, 100000]);
            if(window.hasOwnProperty("crypto") && typeof window.crypto.getRandomValues === "function"){
                window.crypto.getRandomValues(array);
                console.log("works");
            } else {
                //no support for crypto, get crappy random numbers
                for(var i=0; i < 1000; i++){
                    array[i] = Math.floor(Math.random() * 100000) + 1;
                }
            }
            return array;
        }
and place any image as a background 😊
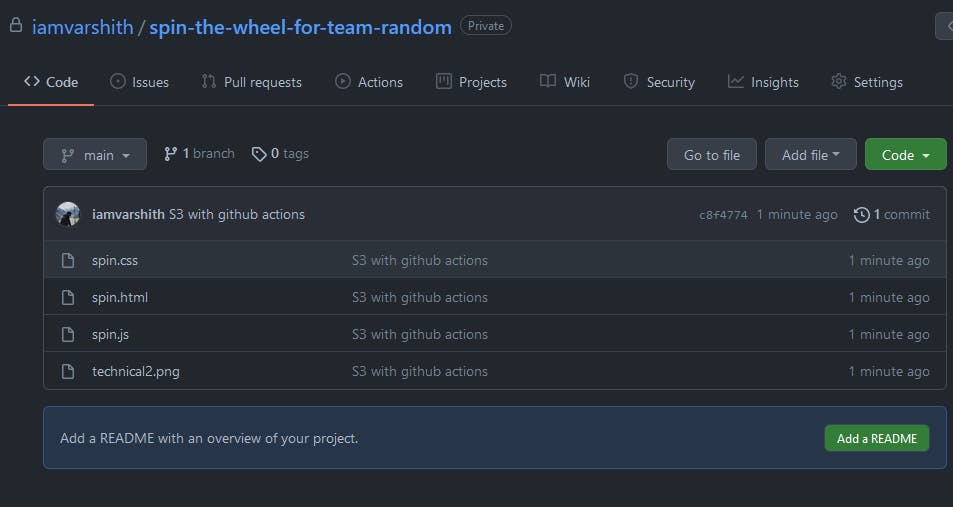
This repository Looks like this

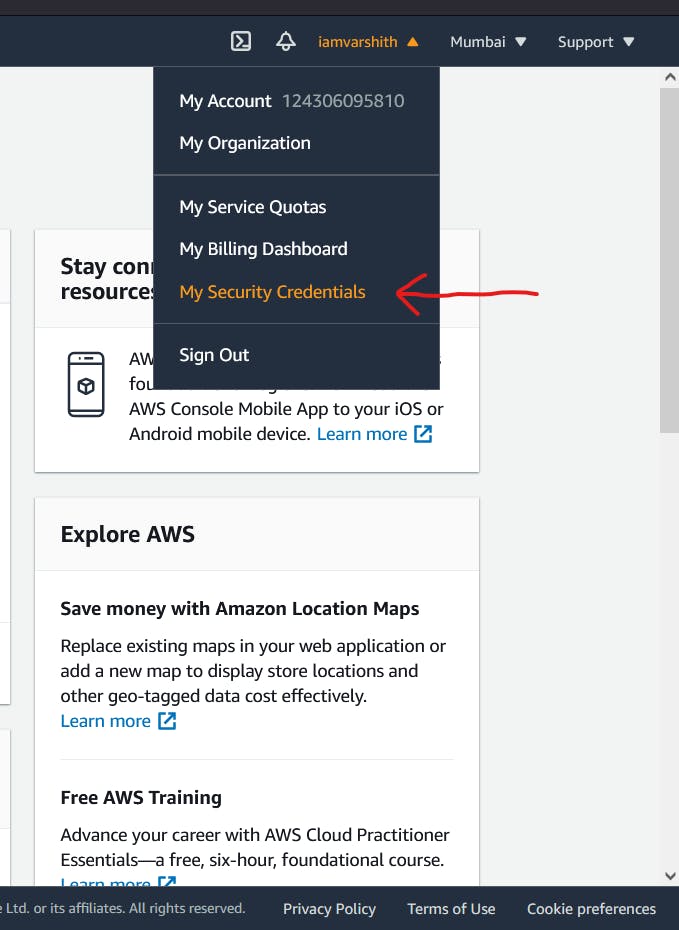
Step - 3 AWS time !
Log on to your AWS account and create IAM User with programmatic access and do as following -
And Now select the Security Credentials option
And then select download options
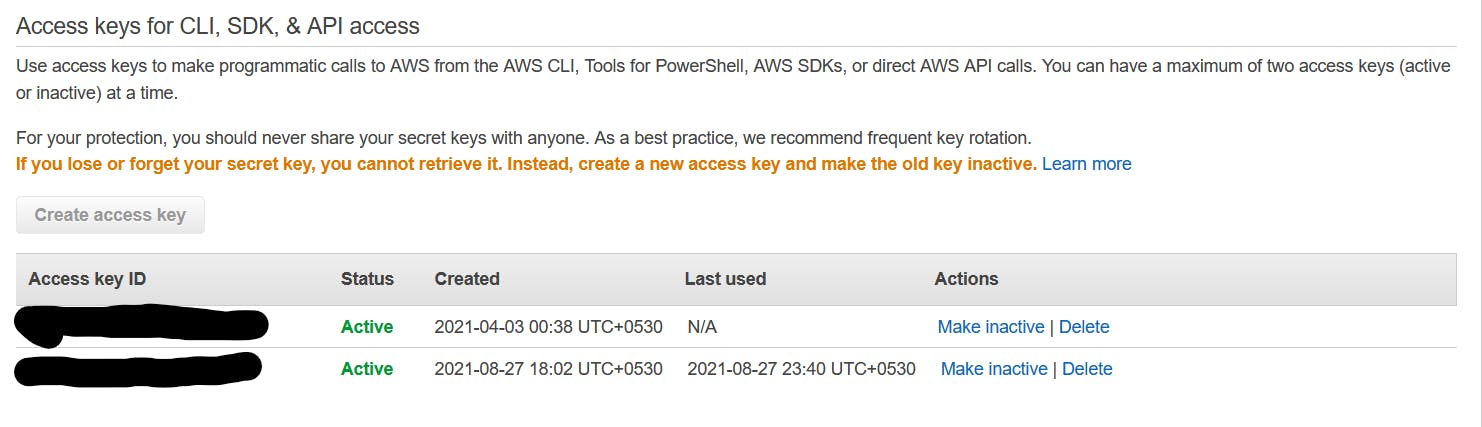
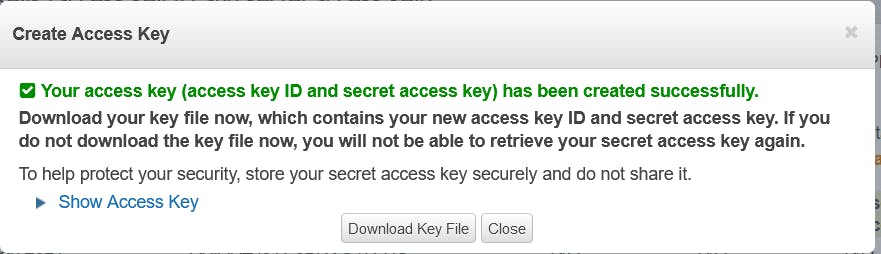
Once the ID and key are downloaded. hold on to them. and now create an S3 Bucket from the AWS console.
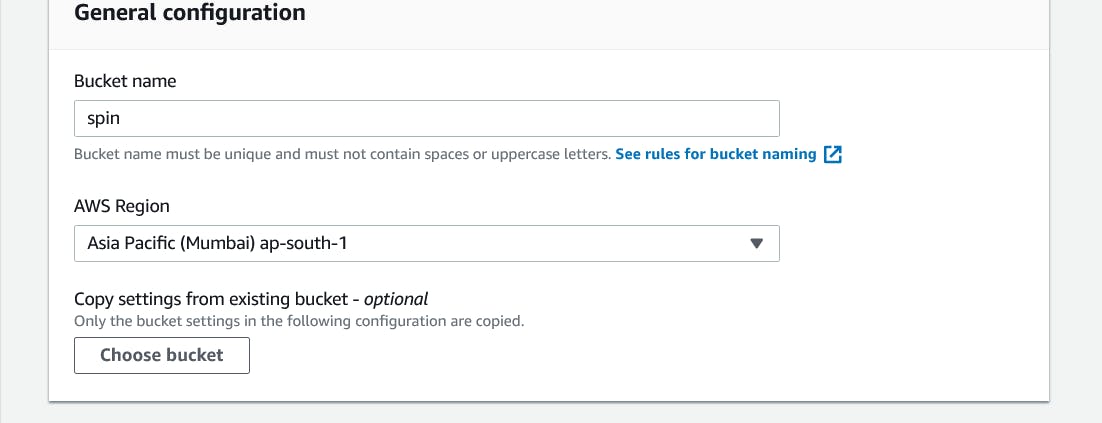
I have Named my bucket SPIN, but remember that when you are creating an S3 for your domain say example.com then the S3 name must be the name of your domain. Else the CNAM from your Domain will not work

And in permissions - Bucket policy add the following code
{
    "Version": "2012-10-17",
    "Statement": [
        {
            "Sid": "PublicReadGetObject",
            "Effect": "Allow",
            "Principal": "*",
            "Action": [
                "s3:GetObject"
            ],
            "Resource": [
                "arn:aws:s3:::Bucket-Name/*" ( Replace this with your bucket name )
            ]
        }
    ]
}
And then in properties of S3 Enable your Static web Hosting and give your page homepage name like Index.html
Now Get back to the GitHub repo create a File with the name .github in that folder make another folder Named workflows in that put the code below with file name
main.yml
name: Upload Website

on:
  push:
    branches:
      - main

jobs:
  iamvarshith_dev:
    runs-on: ubuntu-latest
    steps:
      - name: Checkout
        uses: actions/checkout@v1

      - name: Configure AWS Credentials
        uses: aws-actions/configure-aws-credentials@v1
        with:
          aws-access-key-id: ${{ secrets.AWS_ACCESS_KEY_ID }}
          aws-secret-access-key: ${{ secrets.AWS_SECRET_ACCESS_KEY }}
# aws-region
          aws-region: us-east-1( Replace with your AWS Bucket Region)

      - name: Deploy static site to S3 bucket
# Your bucker name
        run: aws s3 sync . s3://Bucket_name --delete
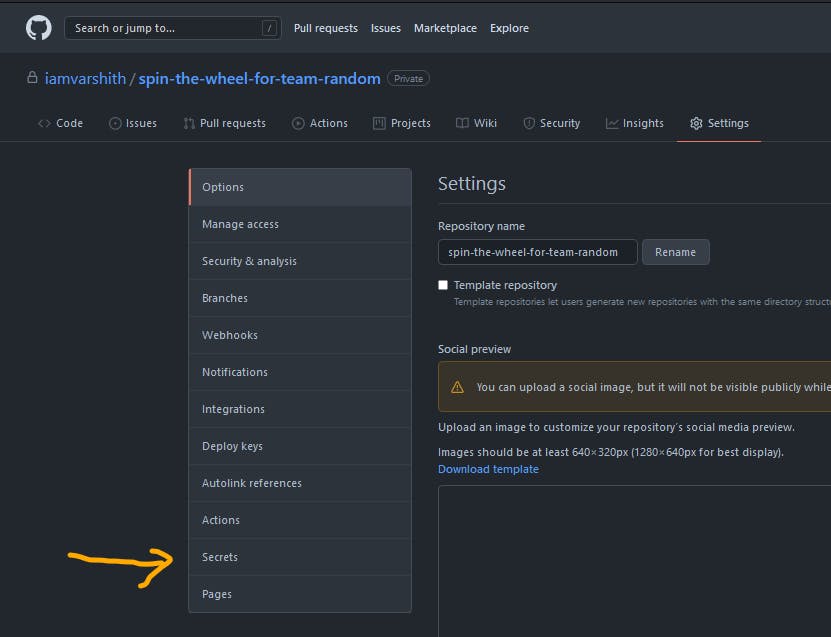
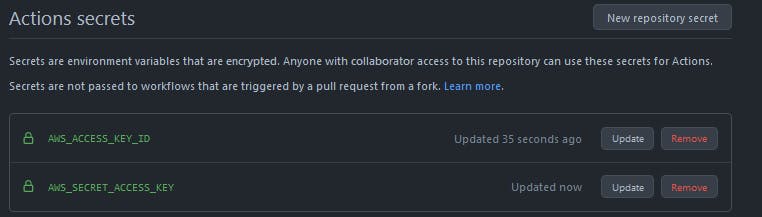
And Now find Secrets in the setting just like shown below.
And then add the AWS credentials which you have downloaded before from AWS.
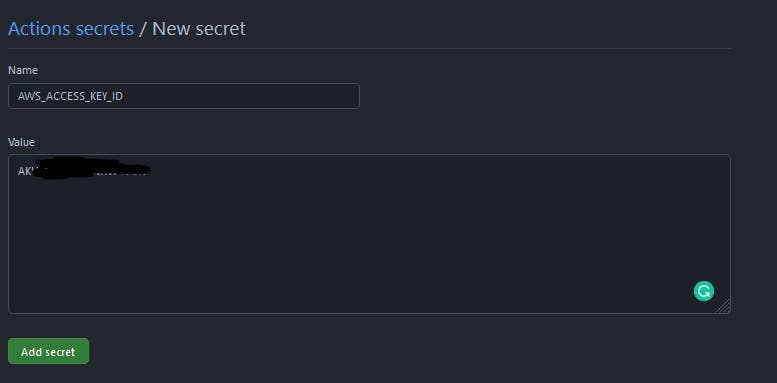
Do the same with both AWS_ACCESS_KEY_ID and AWS_SECRET_ACCESS_KEY remember that the names of these variables should not be changed.
Done ! Now push any update onto the main branch and go to GitHub actions to see if there is an error. Enjoy your automatic Push upgradable AWS S3 bucket with GitHub actions.